FAQ
| Traveller Interface | Business Interface | |
|---|---|---|
| Purpose | Personal travel planning: • Travel route mapping • Saving travel ideas • Plan holiday itineraries | Business mapping & data analytics • Convert large, complex data into a secure, custom map in minutes • Visualise and analyse business data • Plan sales trips, mega-events and business trips |
| Use cases | Plan vacation travel itineraries: • Self-planners: plan your own road trips, weekend trips, European holidays • Professional itinerary planners: plan customised travel itineraries for clients; | Anyone who works with a lot of locations: 1) Real estate & construction Track how your properties are performing or use it to showcase your portfolio to clients 2) Website design Embed the map onto your website to showcase your destinations 3) Data analytics Map out your locations, competitors, and customers on one intuitive interface, use custom filters to compare and gain valuable insights you can’t see from graphs and charts 4) Marketing & business planning The clearest way to see your geographic strengths and weaknesses, and find new territory areas for targeted marketing or business expansion 5) Field sales See all your customers and new leads laid out on one map, and plan more productive sales trips (saving fuel costs and see more accounts) 6) Event planning View all your venue options on one dynamic map, use filters to shortlist and find the most ideal event locations 7) Business trips: see all your meeting locations, accommodation, airports on one map with travel times and distances |
| Travel time display | Flight, driving, train, ferry, bus, subway, walking | Flight, driving, walking |
| Create a list of Saved Places | 2 tiers: i. list of cities; then ii. list of saved places under each city | 1 tier: i. all saved places are displayed as one list (i.e. no “list of cities”) |
| Itinerary / route builder | ✔ | ✔ |
| Marker colour change | ✔ | ✔ |
| Print to PDF | ✔ | ✔ |
| Excel data mapping | ✘ | ✔ |
| Map filter | ✘ | ✔ |
| Custom marker label | ✘ | ✔ |
| Website embed link | ✘ | ✔ |
| Interactive Australian demographic data map | ✘ | ✔ |
- Traveller Interface
Create your itinerary in 3 simple steps:- Step 1: Create your list of cities / towns (e.g. Paris, London, Tokyo etc)

- Step 2: Under each city, add your list of city “places” (e.g. airport, hotels, restaurants, office building, places of interest etc)

- Step 3: When you are ready, add dates to the cities and city places

- Done! You can now preview your day-by-day itinerary

- Step 1: Create your list of cities / towns (e.g. Paris, London, Tokyo etc)
- Business Interface
Create a custom map for your business in 1 simple step!- Step 1: Copy/paste your spreadsheet data or enter place name individually

And it’s done!
Customisable filters automatically created based on your spreadsheet column headers.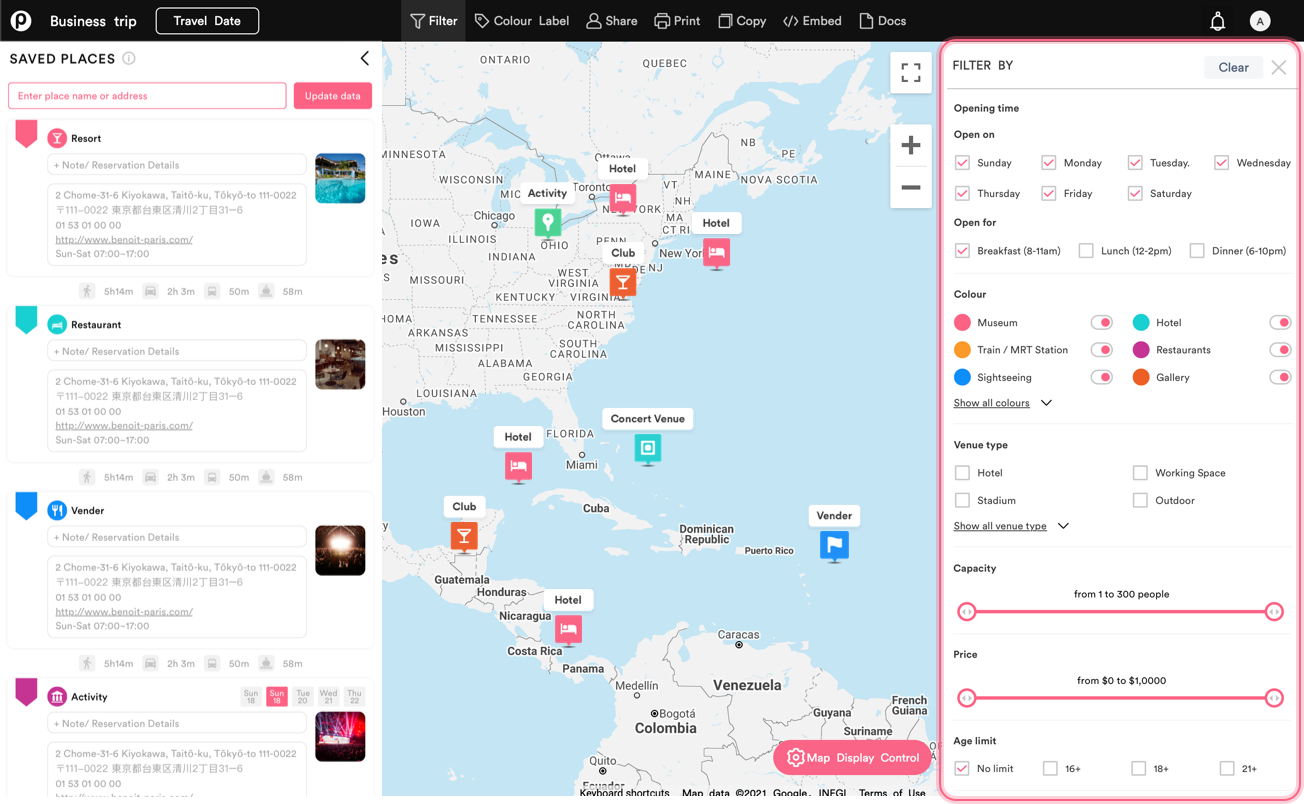
- Step 1: Copy/paste your spreadsheet data or enter place name individually
- The first column will be used to identify your locations (please use Google Maps place names or addresses to avoid map matching error);
- For franchise locations, include "branch area" in the place name in the place name to improve mapping accuracy (e.g., "Alter Brewing Downers Grove", "Alter Brewing St Charles")
- Up to 15 columns of additional data (no need to include Google Maps details like website, phone, opening hours and address - they will be auto-generated if available);;
- Remember to include column headers (e.g., Price, Sales, Priority) as the first row of your dataset because they will be used to generate map filters;
- Number-based columns need to contain only numbers so map filters can work correctly; and
- If you have description or overview for each place, you can include one or more "Notes" column (e.g. "Notes 1", "Notes 2")

Once your spreadsheet data have been imported. To edit or update:
- Individual data – You can click on the data and edit directly
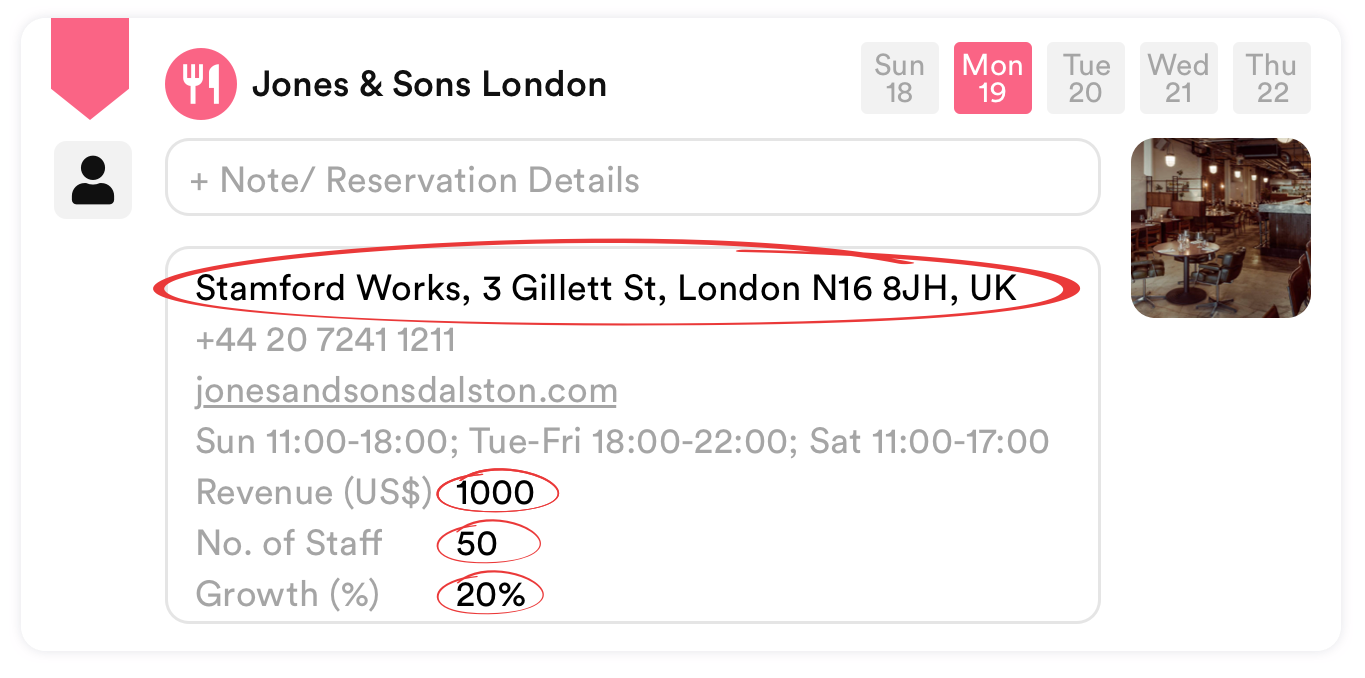
- The entire dataset – You can click on the “Update data” button to paste in your new spreadsheet data

- If you imported spreadsheet data –
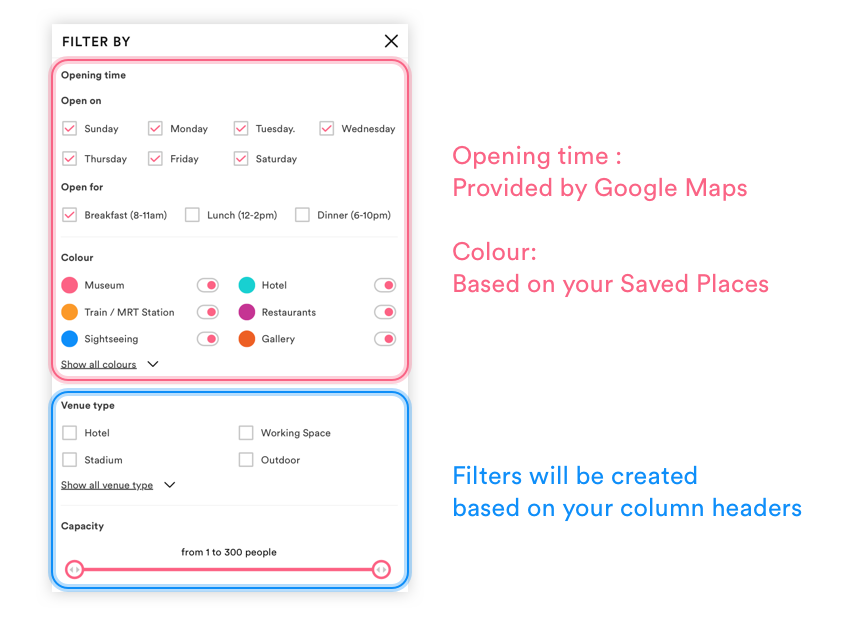
Filters will be created based on your column headers (e.g., “Price $”, “Capacity”, “Sales $”, “Sales Rep”, “Affiliate”, “Priority”, “Last action”, “Next meeting date”etc) - If you didn’t import data –
There will only be two possible filters:- Opening days & hours – as provided by Google Maps
- Colour labels – if you have assigned colour labels to your Saved Places
- Map marker colour label
You can create custom colour labels and assign to each Saved Place individually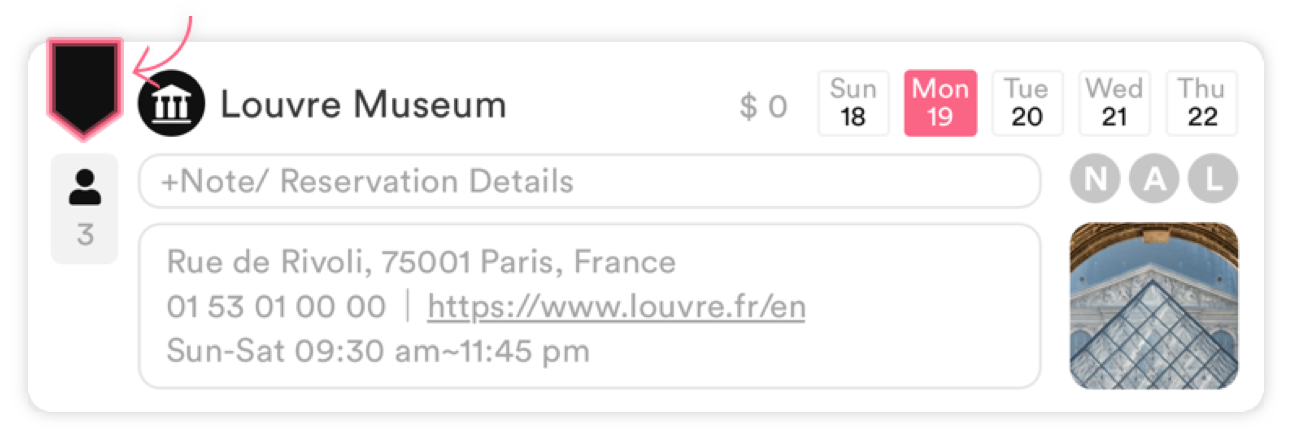
Assign colour to a group of markers based on your spreadsheet data value (e.g., “High Priority”, “Hotel”, “Full capacity”) (coming soon) - Map marker name label
You can change marker name label by clicking on this switch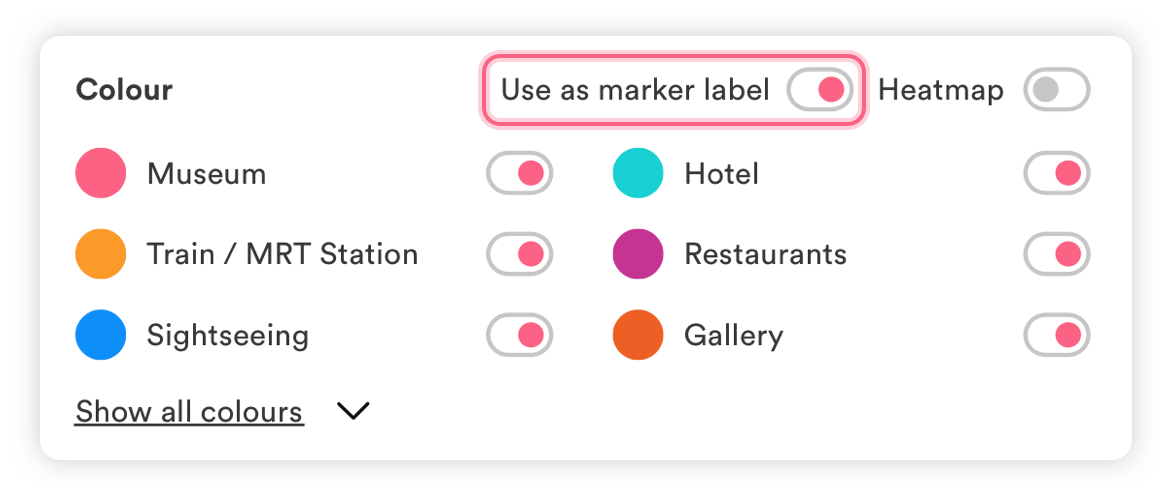
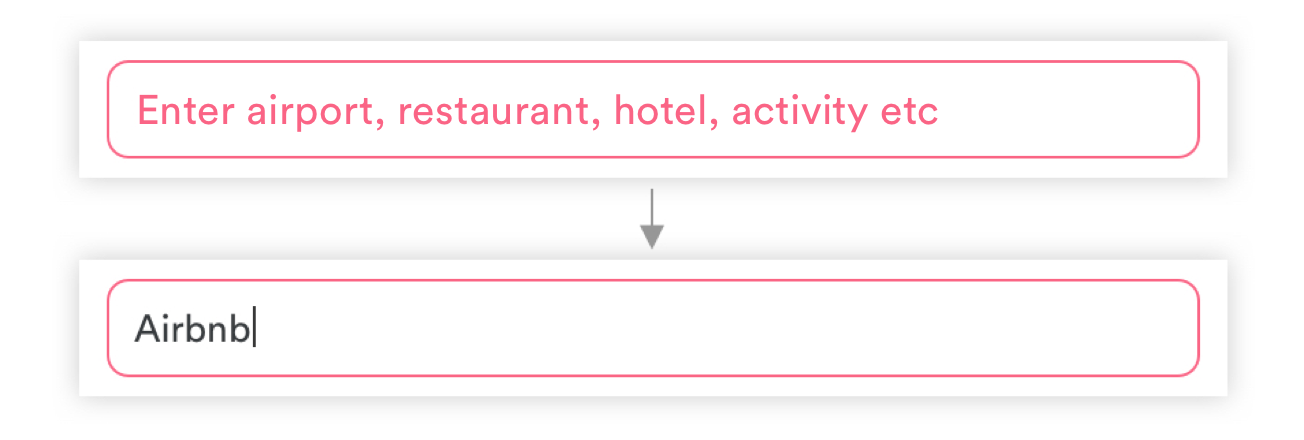
- Step 1: In the “Enter airport, restaurant, hotel, events” field: type "Airbnb“ -> press ENTER.
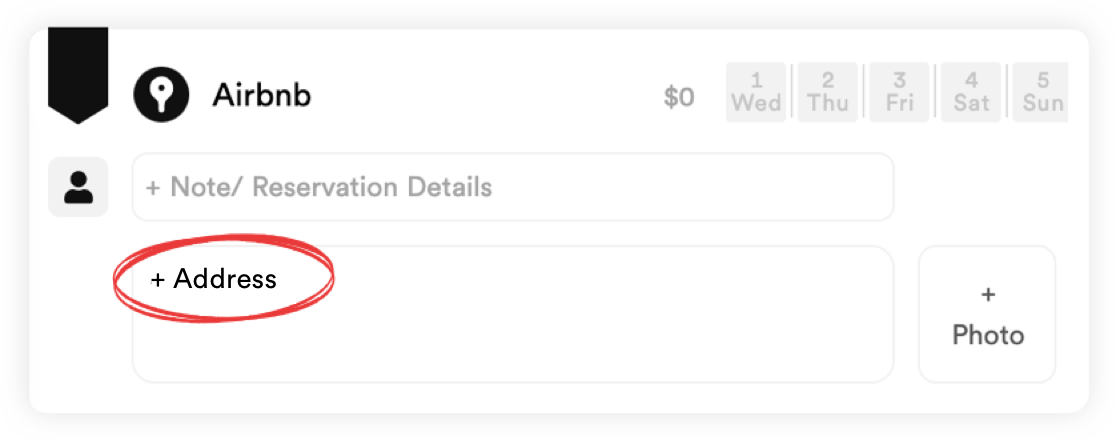
- Step 2: Then add the actual address in the “+ address” field.
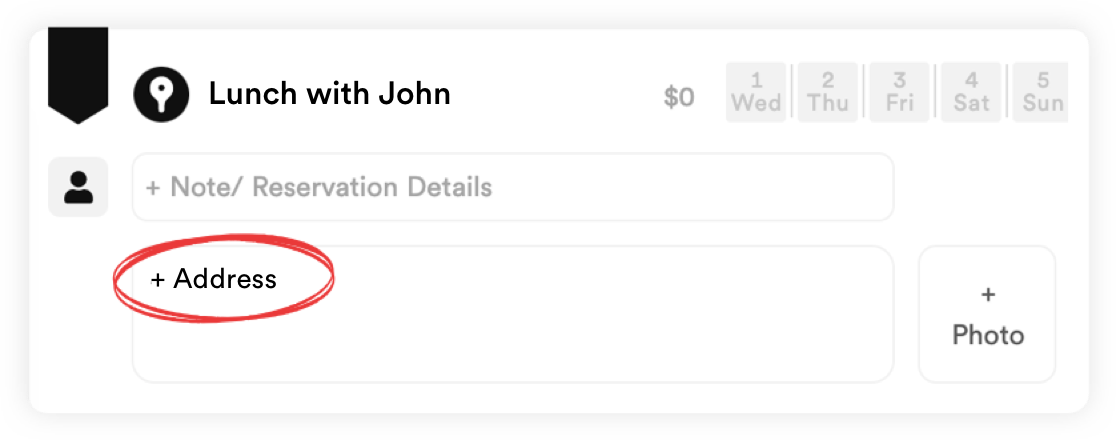
- Step 1: In the “Enter airport, restaurant, hotel, events” field: type "Lunch with John“ -> press ENTER.
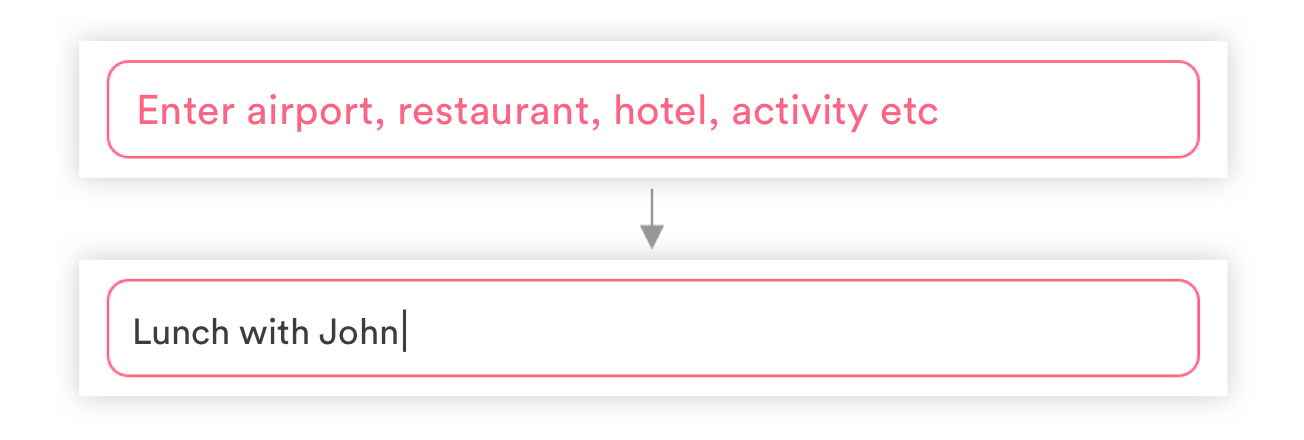
- Step 2: Then add the actual address in the “+ address” field.
- Step 1: Select the text or picture that you want to display as a hyperlink.

- Step 2: Click on the link icon.

- Step 3: Enter the URL you want to link.

Now you can see the hyperlink.
- Create view-only public URL

- Add people to the map so they can edit and collaborate

All new users are entitled to a full access free trial - 1 month for Traveller Interface and 14 days for Business Interface.
At the end of the trial period, you will continue to have access to all your itineraries/maps. They will NOT expire at the end of your free trial. If you only want to view them, then you don't need to pay anything. If you would like to continue to make edits or create a new one, you will be prompted to pay.
At the end of the trial period, you will continue to have access to all your itineraries/maps. They will NOT expire at the end of your free trial. If you only want to view them, then you don't need to pay anything. If you would like to continue to make edits or create a new one, you will be prompted to pay.
Traveller Interface
Pay per itinerary
US$3
unlimited users
up to 3 cities
which will entitle you and all your Trip Buddies full editing power for an unlimited amount of time
Pay per itinerary
US$10
unlimited users
Unlimited number of cities
which will entitle you and all your Trip Buddies full editing power for an unlimited amount of time
Monthly subscription
US$9.95
per person
Unlimited itineraries
All added Trip Buddies will be able to edit without having to pay separately
* You can cancel your subscription at anytime. Once you cancel your subscription, you will lose editing power.
Business Interface subscription
Monthly subscription
US$199
per person
Unlimited use of Business Interface
If you add people to your maps to collaborate, they will not need to pay separately.
* You can cancel your subscription at anytime. Once you cancel your subscription, you will lose editing power.
No matter what device you're using, your subscription's auto-renewal will be managed outside of the app.
(Don't worry, your editing power will still work until the end of the billing cycle!)
iOS
(Don't worry, your editing power will still work until the end of the billing cycle!)
iOS
- Go to Settings > iTunes & App Store.
- Tap your Apple ID at the top of the screen.
- Tap View Apple ID.
- Tap Subscriptions.
- Select the subscription that you want to manage. If you don't see any subscription but are still being charged, make sure that you're signed in with the correct Apple ID.
- Tap Cancel Subscription.
- Open the Play Store.
- From the main page, tap the menu icon in the top left corner, next to the Google Play text.
- Tap Subscriptions.
- Select the subscription that you want to manage. If you don't see any subscription but are still being charged, make sure that you're signed in with the correct Google account.
- Tap Cancel Subscription.